Raised garden beds look great and they allow you to garden at a comfortable height. They have many other benefits, including better drainage for winter growing, thermal insulation to help plants grow and a tidier garden layout.
Building a raised garden bed is easy to do. Choose a level, sunny spot out of the wind to site your bed. Rectangular beds work best as it can be hard to access the centre of a large square garden bed.


Visit your local Central Landscapes yard and choose from our range of sleepers. Get your sleepers delivered or grab one of our free loan trailers to bring them home.
Here, we're putting together a rectangular garden bed using 200mm by 100mm macrocarpa sleepers: 2.1 metres for the long side, and 700mm lengths for the short side. We're stacking them vertically so we get a 400mm high structure, which is a good depth for plant roots to develop.
This garden bed is on a concrete base, so we'll elevate it off the ground with pavers to prevent rot.
Macrocarpa Sleepers
Macrocarpa is untreated hardwood, so the sleepers should not be placed directly onto wet soil. If you're planning to build your raised garden bed on a lawn area or bare ground, lay a base of Gap 7 beneath the sleepers first.

If you're not planning to build immediately, store your sleepers off ground, to keep the timber dry.
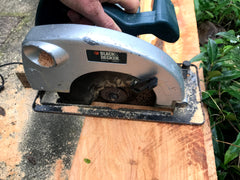
You may need to trim your sleepers so they're all the correct length.
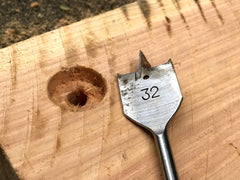
Mark two points (each 50mm in from each side) at both ends of your 700mm short side sleepers.
Drill two 10mm deep countersink holes with a 32mm spade bit. These will allow your coach screws to sit flush with the surface.
Drill 12mm holes through the sleeper for the 10mm coach screws.
Position your sleepers where you want them; use small
pavers as foundation blocks to keep the sleepers off the concrete. This will also allow the garden bed to drain properly, avoiding water-logging.
Make sure the sleepers are square and level.
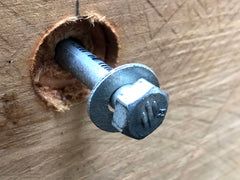
We're using 150mm M10 galvanised coach screws (with washers). You can also use stainless steel screws for maximum durability.
Push the screws through the 12mm drilled holes and tap with a hammer to make a drill mark in the adjoining long side sleeper.
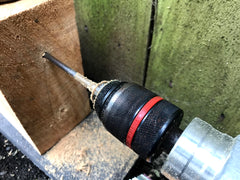
Remove the short side sleeper and drill 6mm pilot holes.
Rub wax onto the thread of your coach screws. This will make it easier to screw them in.
Install the coach screws (including washer) with a racket driver. Partially screw one on each side and tighten them alternately to ensure the sleepers draw together evenly.
Once the base layer is complete - repeat the process with the second layer.
Fix the two layers together in the corners using stainless steel multigrips.
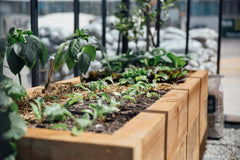
Now we've completed the raised garden box, we can start filling it!
In this case, we're recycling broken concrete as a base.
Scoria also works well as a free-draining base layer. Next, we'll staple a lining material to the inside of the box, to provide a water barrier between the sleepers and the soil. You can use polythene plastic or even canvas.